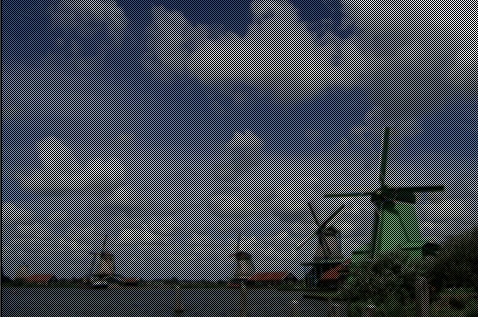
BayarFilter
カメラが画像を出力するまでは以下のような手順をたどる.
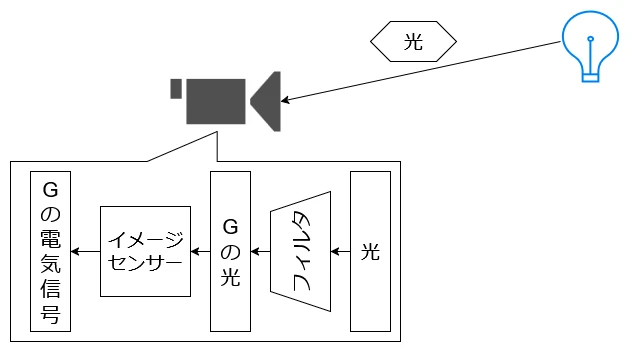
光がレンズを通った後はフィルタを通して波長からRGBの1色をフィルタリングする.図ではG.
そうしてGの波長はイメージセンサを通って、Gの電気信号として抽出されることになる.
この流れの中でフィルタはどういう実装をするのか?というのが問題になるわけだけど,有名なのはベイヤーフィルターである.
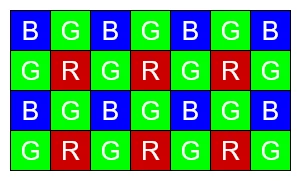
この図を見ればわかるが、R:G:B=1:2:1という風にGが多めの配置となっている.
これはなんでかというと、Gは人の目でも特に敏感な処理であるからである.
これはFXAAなんかも似たような特性を生かしてやってたりする.
まずはこのベイヤーフィルターを適用してみた画像を作ってみよう.
まずは奇数か偶数かを判断できるようにindexを取っておく.
青は横が偶数,縦が偶数のindexとなる.
赤は横が奇数,縦が奇数のindexとなる.
そのため、Index=0 -> 赤, Index=1 -> 緑, Index=2 -> 青 となるように設定する.
int rgbIndex = 1;
if (hIndex == 0 && wIndex == 0) { rgbIndex = 2; }
else if (hIndex == 1 && wIndex == 1) { rgbIndex = 0; }
result.x = rgbIndex == 0 ? result.x : 0;
result.y = rgbIndex == 1 ? result.y : 0;
result.z = rgbIndex == 2 ? result.z : 0;
auto filterProcess = [&](int w, int h)
{
Vec3 result = static_cast<ColorF>(image[h][w]).rgb();
int wIndex = w % 2;
int hIndex = h % 2;
int rgbIndex = 1;
if (hIndex == 0 && wIndex == 0) { rgbIndex = 2; }
else if (hIndex == 1 && wIndex == 1) { rgbIndex = 0; }
result.x = rgbIndex == 0 ? result.x : 0;
result.y = rgbIndex == 1 ? result.y : 0;
result.z = rgbIndex == 2 ? result.z : 0;
tempImage[h][w] = { ColorF(result, 1.0f) };
};
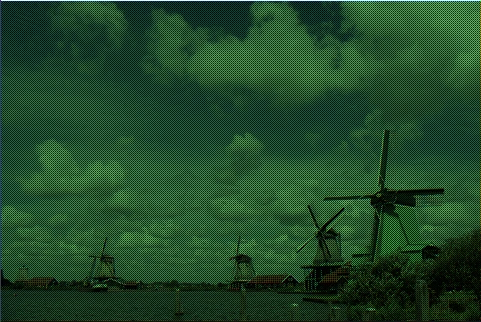
こうしてできたデータで、次はデモザイク処理、つまり元の色を復元してみよう.
まずは上下左右の値の平均を計算する.
Vec3 first = static_cast<ColorF>(tempImage[h - 1][w]).rgb();
first += static_cast<ColorF>(tempImage[h + 1][w]).rgb();
first += static_cast<ColorF>(tempImage[h][w - 1]).rgb();
first += static_cast<ColorF>(tempImage[h][w + 1]).rgb();
first /= 4.0;
Vec3 second = static_cast<ColorF>(tempImage[h - 1][w - 1]).rgb();
second += static_cast<ColorF>(tempImage[h + 1][w - 1]).rgb();
second += static_cast<ColorF>(tempImage[h + 1][w + 1]).rgb();
second += static_cast<ColorF>(tempImage[h - 1][w + 1]).rgb();
second /= 4.0;
今回は緑の場合は試しに黒が出るようにする. 次に赤,赤の場合は赤のピクセルに対して緑は上下左右,青は斜めの上下左右を取ればよい.
青は青のピクセルに対して緑は同じように上下左右,赤は斜めの上下左右を取ればよい.
この処理をまとめると以下のようになる.
auto demosaicProcess = [&](int w, int h)
{
Vec3 result = static_cast<ColorF>(tempImage[h][w]).rgb();
Vec3 first = static_cast<ColorF>(tempImage[h - 1][w]).rgb();
first += static_cast<ColorF>(tempImage[h + 1][w]).rgb();
first += static_cast<ColorF>(tempImage[h][w - 1]).rgb();
first += static_cast<ColorF>(tempImage[h][w + 1]).rgb();
first /= 4.0;
Vec3 second = static_cast<ColorF>(tempImage[h - 1][w - 1]).rgb();
second += static_cast<ColorF>(tempImage[h + 1][w - 1]).rgb();
second += static_cast<ColorF>(tempImage[h + 1][w + 1]).rgb();
second += static_cast<ColorF>(tempImage[h - 1][w + 1]).rgb();
second /= 4.0;
int wIndex = w % 2;
int hIndex = h % 2;
int rgbIndex = 1;
if (hIndex == 0 && wIndex == 0) { rgbIndex = 2; }
else if (hIndex == 1 && wIndex == 1) { rgbIndex = 0; }
if (rgbIndex == 0)
{
result.y = first.y; result.z = second.z;
}
else if (rgbIndex == 2)
{
result.x = second.x; result.y = first.y;
}
else
{
    result.y = 0;
}
resultImage[h][w] = { ColorF(result, 1.0f) };
};